![94682b08-af4e-42f2-b868-af7439511c70.jpg]](https://support.growdata.com.au/hs-fs/hubfs/94682b08-af4e-42f2-b868-af7439511c70.jpg?height=50&name=94682b08-af4e-42f2-b868-af7439511c70.jpg)
The Master Records feature is a custom add-on, as it's not something all Growers require. It's included in your subscription, so just reach out to out Grower Support team if you need it applied to your database.
Video Overview:
How to Use the Master Record in your Spray Diary
1. Go to Enter Data > Spray Diary
2. Tick the Master Record box in the top left of the Spray Diary screen, then select 'Yes': 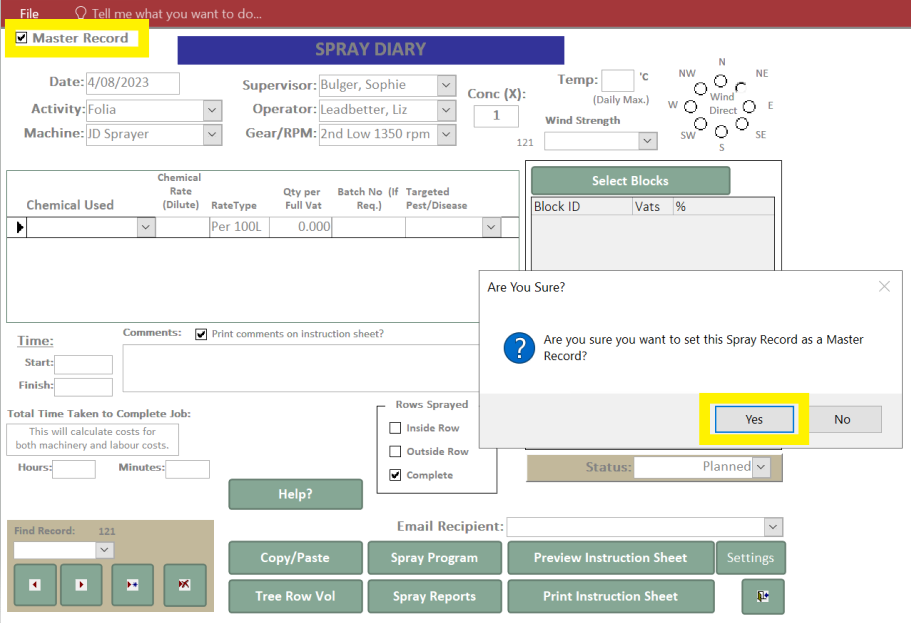
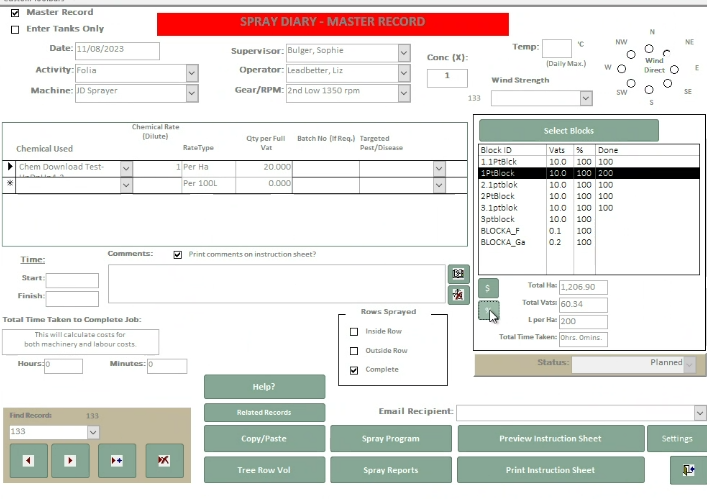
Once this has been selected, you'll see a red box appear at the top of the screen identifying it as a Master Record.

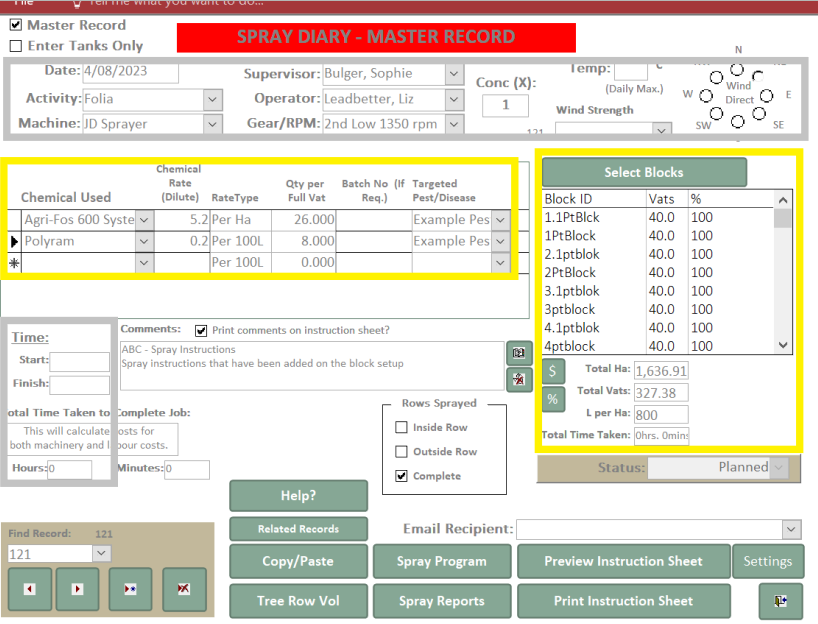
3. Enter the details for the entire job - including all blocks to be sprayed.
Just select a default Operator and Machine in here. This will be copied onto the part records and you'll have the ability to change later. Weather details, and start and finish times are irrelevant to this record so these can be ignored.
Note: This record will not pull into the Spray Diary report as it's almost a 'dummy spray'. You'll notice you won't be able to change the status dropdown on this Master Record.
4. To create a part or child record, click the copy/paste button. A popup will appear, click yes and you will be taken to a new record with details drawn from the master. 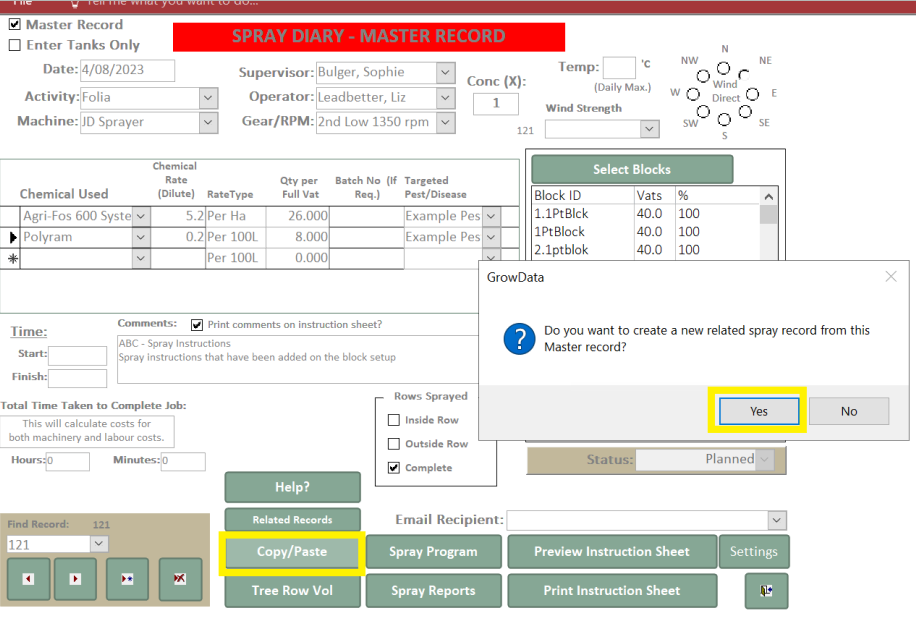
On the image below, you'll see at the top it now says 'Part Record'.
You'll also see at the bottom left, the record number has changed (in this example, the master is #121, and child is #122)
5. Remove the unsprayed blocks. On the Part record, to remove blocks which have not been sprayed on that day, select the delete icon next to 'select blocks' and a popup screen will appear. Select the blocks you wish to remove and which have not been sprayed.
(Hold down the ctrl key on your keyboard + click on the blocks in the list)
Then, click 'Remove Selected Blocks'.
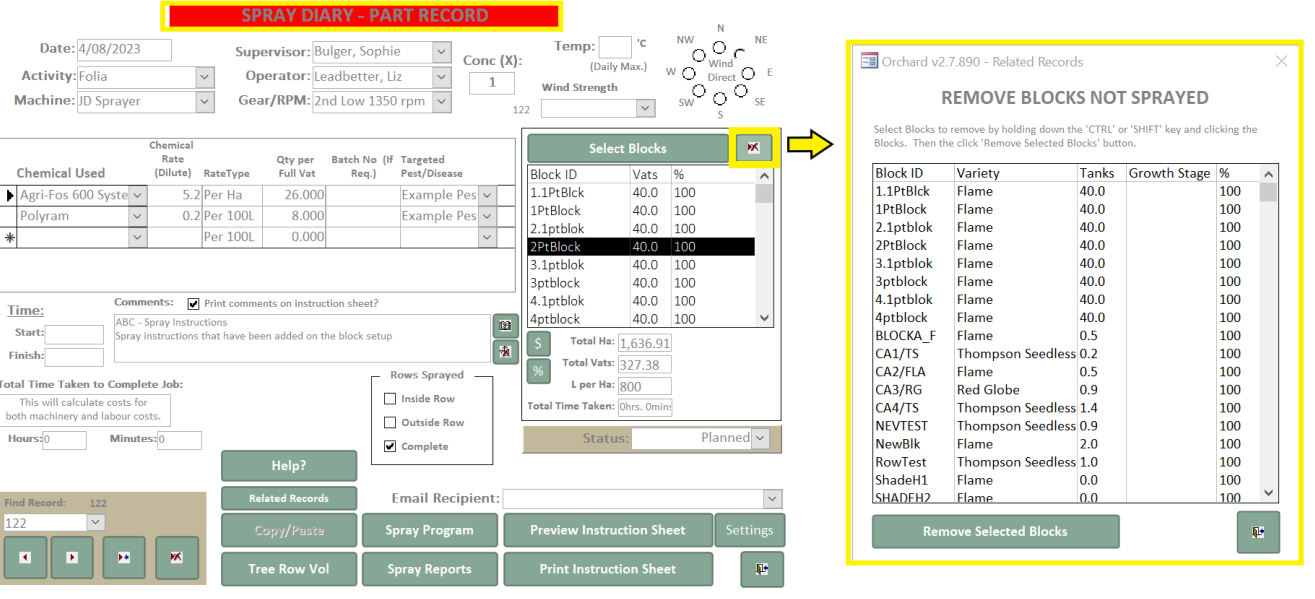
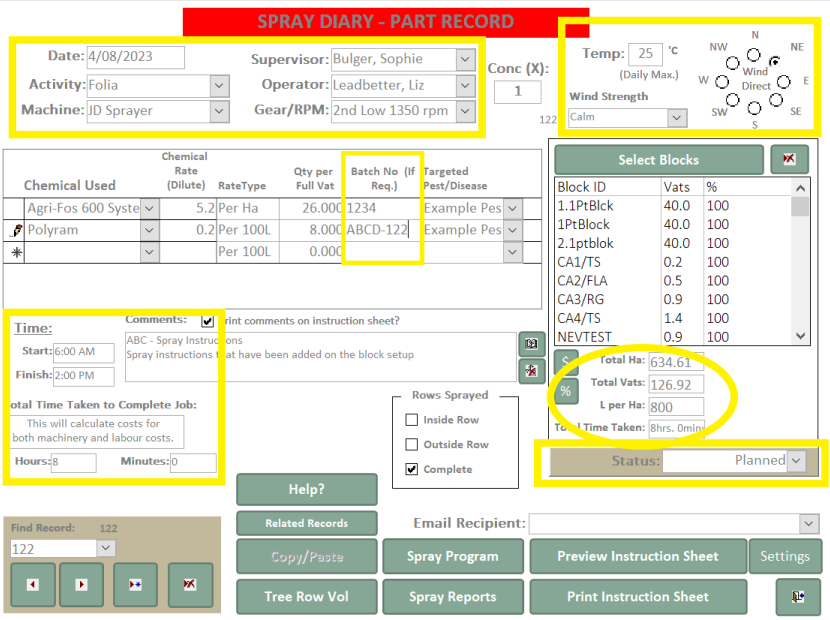
6. Ensure the details are correct. On the image below, you will now see these blocks have been removed from the list on the Part record and the Total Ha and Vats have been adjusted accordingly.
Ensure the other details for the Part record accurately reflect the job that's been completed.
- Date
- Machine
- Supervisor
- Operator
- Weather details
- Chemical batches
- Start and finish times
- If only a portion of a block has been completed, double click on the block and change % of block sprayed
- If the tanks used need to be altered, click 'Select Blocks' > Total Vats, and change accordingly
7. Complete the Part Record. Once all details are correct and you're ready to tick off this record, change the status of the job from Planned to Completed.
This is the record that will show on your Spray Diary report and deduct the relevant inventory amounts etc.
8. Create the next job (or Part Record). Go back to Master Record and click the Copy/paste button. This will create another spray record, deducting out blocks that have already been completed in other Part Records.
Click on 'Related Records' to see all jobs connected to that Master Record. This also gives you the Record numbers, which you can then search in the dropdowns in bottom left corner of the screen (i.e. above the record # is 122).
Tips:
- In an example where you may be using two spray rigs each day, you will need to Copy/Paste each new record twice and change the name of the operator and spray rig on one of them.
- The 'Enter Tanks Only' tick box in the top left corner can be ticked if you want the part records to be forced to enter the total 'actual vats' used on that job, giving you more accurate inventory management.
- To avoid the danger of over spraying blocks, if you create two part records for the same block, you'll receive the following popup notification:

- To see where you're up to with the whole job, go back to the master record and you'll see the % Done in the blocks list. Note, this % Done is only recognizing Part Records that are in 'Completed' status.