![94682b08-af4e-42f2-b868-af7439511c70.jpg]](https://support.growdata.com.au/hs-fs/hubfs/94682b08-af4e-42f2-b868-af7439511c70.jpg?height=50&name=94682b08-af4e-42f2-b868-af7439511c70.jpg)
Setup Requirements
Before you can use the Packing Program, you'll need to ensure you have set up the following items in GrowData (click on the links to open associated articles):
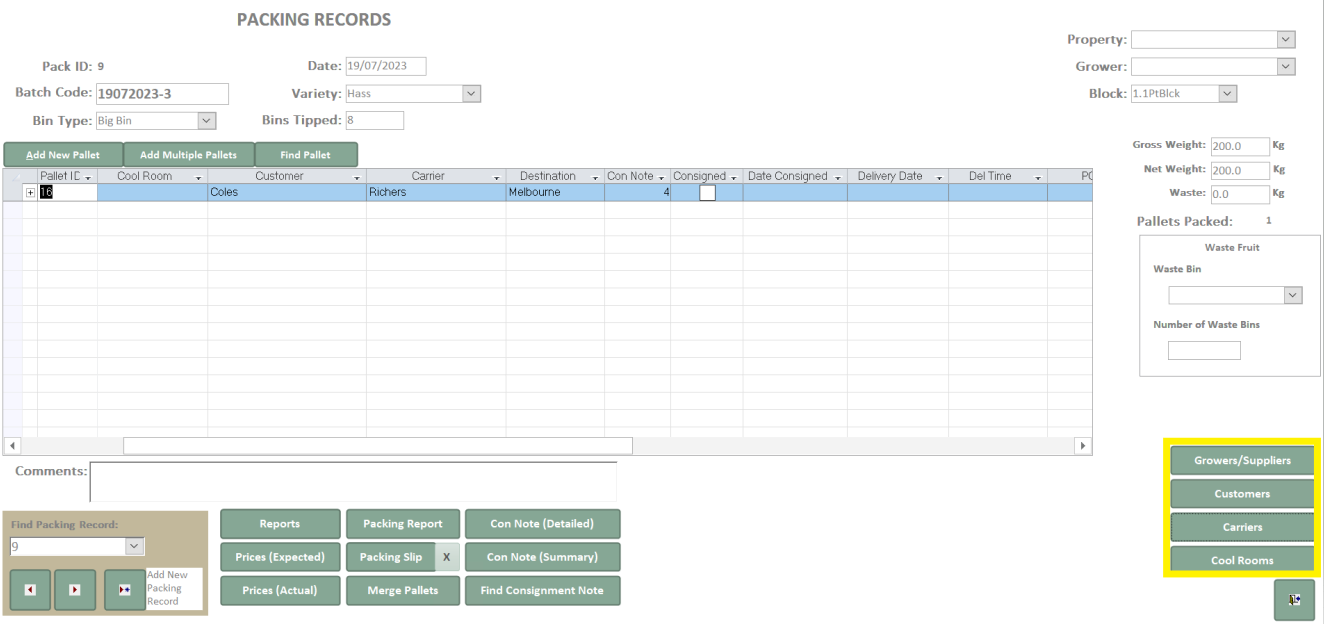
Also note, within the Packing screen you will have the option to enter Growers/Suppliers; Customers; Carriers & Cool Rooms:
PART 1: Generating Harvest Records in GrowData
There are three ways which you could do this:
A. By using the GrowData Harvest App
B. By using the GrowData Stock Receivals Scanning Program
C. By manually entering your picking data into the Harvest Record screen
PART 2: Using the Packing Screen in GrowData
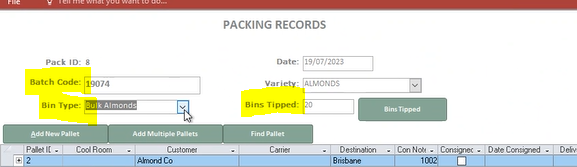
1. Type in fruit batch code - create this code as whatever you like (can be numbers or letters , however it needs to be a unique code)
2. Select the type of bins that are being tipped. Note - these bin types are created in Picking setup. There will be an average weight associated with the bin type/crop, which the packing screen will use to estimate the total weight tipped (e.g. bin type 400kg bin x 20 bins tipped). This total weight of bins tipped will then be associated with this batch.
Example below (looking at the Packing Report):

3. Enter the number of bins tipped. You can type these numbers in or scan in the bin # (this looks to the harvest screen for the bin #, and once you've associated these bin numbers with this packing record, it will feed the batch number back to the harvest screen and therefore associates it with the block)
4. Associate bins to a batch.
When you click on the bins tipped button a list will appear of bins that have not yet been allocated to a packing record/batch. Place your curser in the blank field at the top and scan the bin barcode, to associate it with the app. Or, type in the Bin No and it will do the same thing to allocate the batch number to that bin. Note, even if you do this you will still need to enter the total number of bins tipped.

5. Add a new pallet & its contents
Click 'Add New Pallet'
The Pallet ID is automatically generated.
You may or may not know the Customer, Carrier, Destination and connote number at this stage - so these can be added in now or later - they just need to be entered before the pallet is consigned. (see step 7).
Enter in the contents for what's on the pallet. Click the + next to the Pallet ID to expand. You'll see Pack Types in the dropdown (we set these up in the Packing screen);

6. Generate Packing Slips
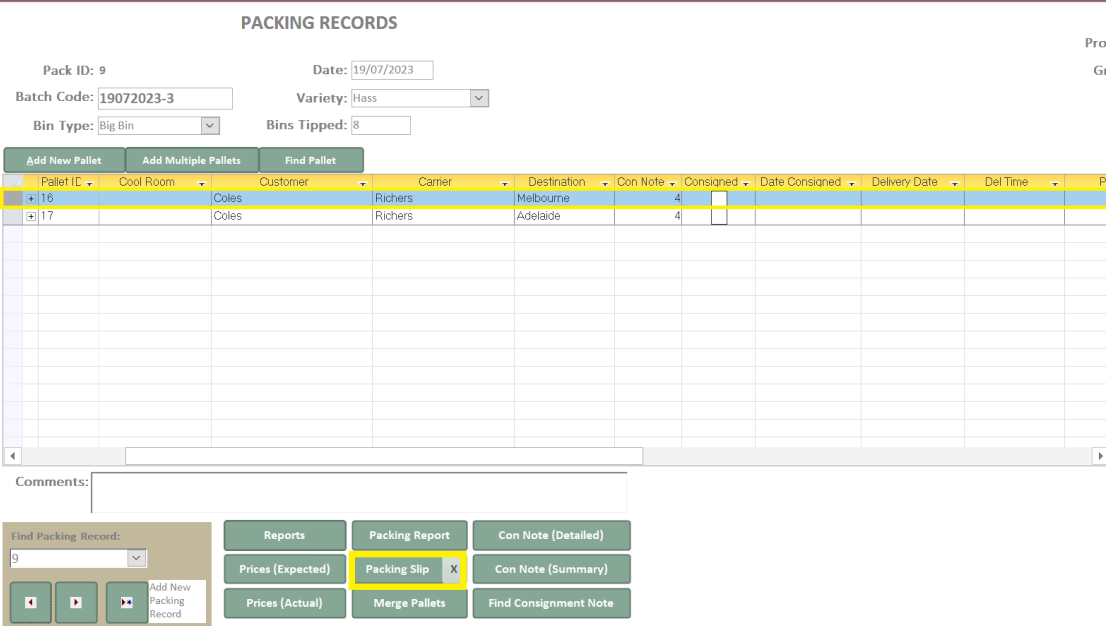
If you've got multiple pallets on your list, you'll need to select the one you wish to generate a packing slip for. You can do this by clicking in the grey square to the left of the Pallet ID, and you'll see the line will turn blue. Then, at the bottom of your screen select 'Packing Slip'.

7. Consign Pallet & Generate Connotes
A Con Note number can be the same across multiple pallets within the same or different batches/packing records - however they must go to the same customer.
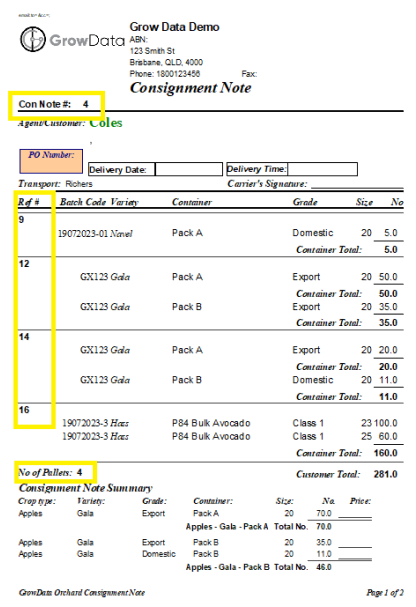
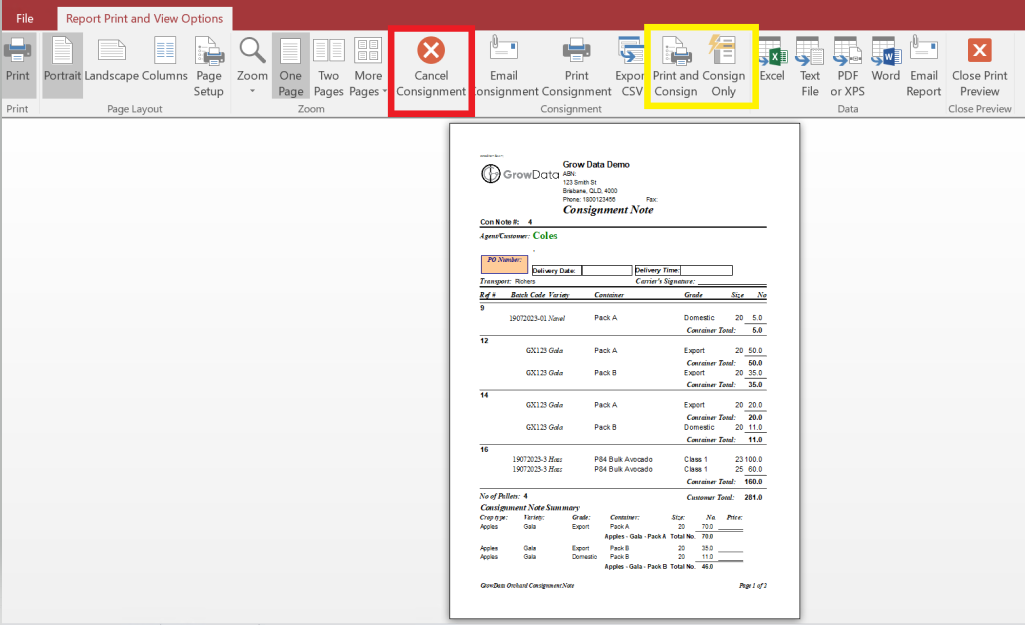
In the example below, the Con Note (detailed or summary) report shows Con Note #4 contains 4 x pallets (#9,12,14 & 16), with a total of 281 Containers going to Coles.
On the Packing Record below for batch 19072023-3, we just have the one pallet (number 16) as part of Con Note 4. The other pallets (numbers 9, 12 & 14 on the report about) will be found within other Packing records, which you can find using the arrows in bottom left of your screen.
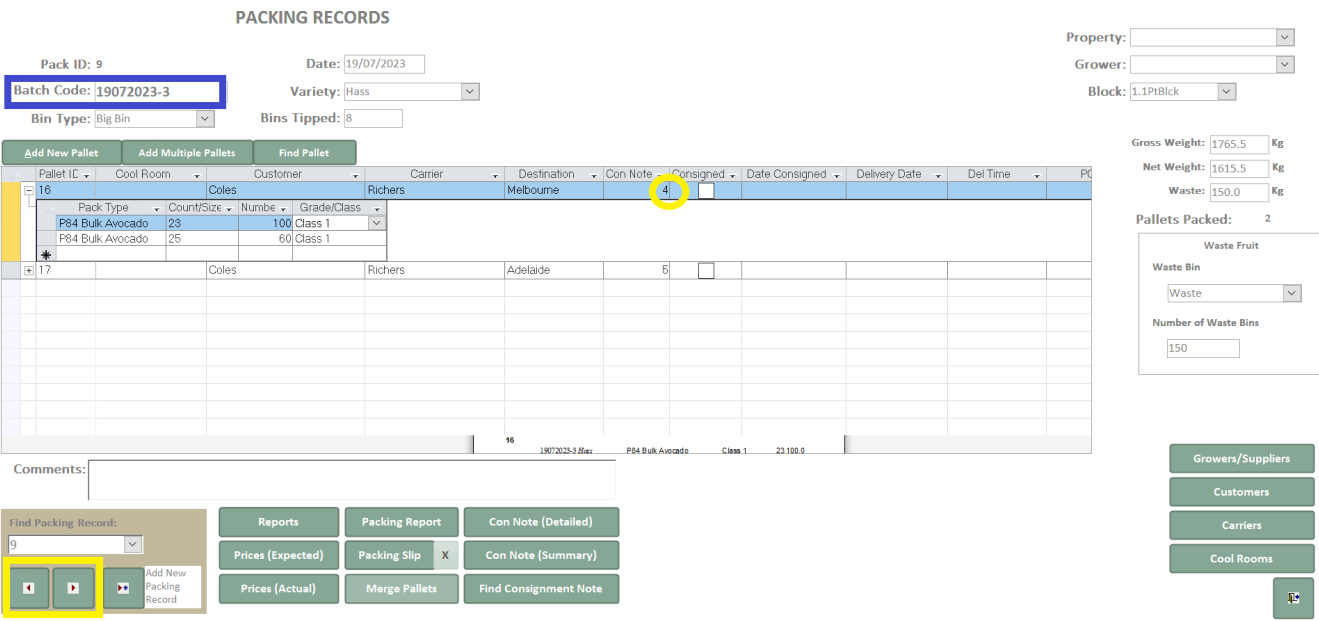
To commit to your consignment, complete the following steps:
1. Ensure the highlighted pallet on your screen has the relevant Con Note number
2. Open up either Con Note (detailed) or Con Note (summary) report.
3. Within the print preview screen, you will have the ability to either:
A. Print & Consign (then select 'yes')
B. Consign Only (then select 'yes')
Now, once you have exited this screen and are back on the Packing Record, you'll see the box has been ticked: 
8. Record Wastage.
To record wastage in your Packing records, you'll need to firstly setup a 1kg waste bin (see link to Packing Setup at the beginning of this article).
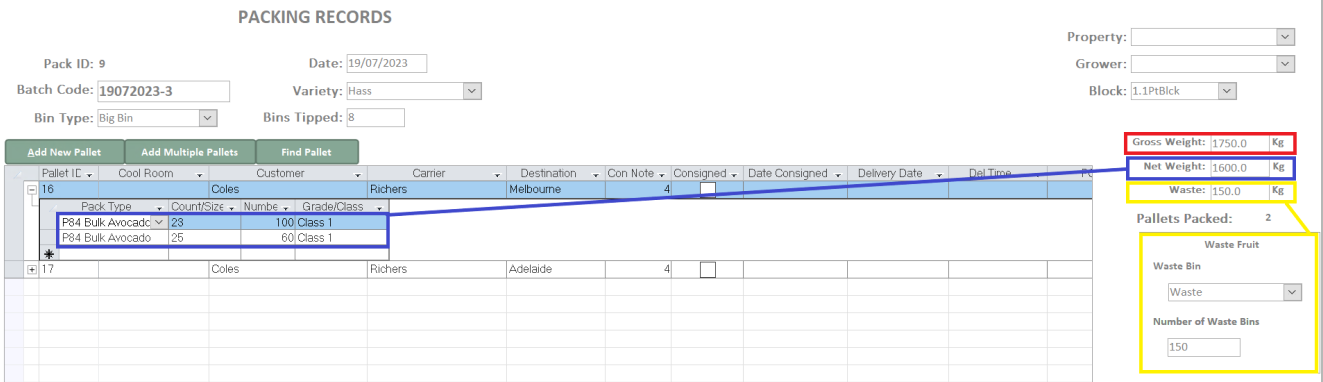
Within Packing record, on the right hand side of the screen you'll see a section called 'Waste Fruit' (highlighted in the snip below).
Select your Waste bin from the dropdown selection. As we have set this up as a 1kg bin, you now simply type in the kilo's of waste and these will be reflected above (in the Waste field under Gross & Net weights).
- Gross Weight = Combined Net Weight + Waste
- Net Weight = Packout weight (in the example below, the P84 Bulk Avocado packing containers weigh 10kg each. 100 containers x 10kg, + 60 containers x 10kg = 1600kg
- Waste = Kilograms of waste
This Waste amount (in kilos and as a %) will also display on the Packing Report: 