![94682b08-af4e-42f2-b868-af7439511c70.jpg]](https://support.growdata.com.au/hs-fs/hubfs/94682b08-af4e-42f2-b868-af7439511c70.jpg?height=50&name=94682b08-af4e-42f2-b868-af7439511c70.jpg)
Step 4 – Installing the Hub Box
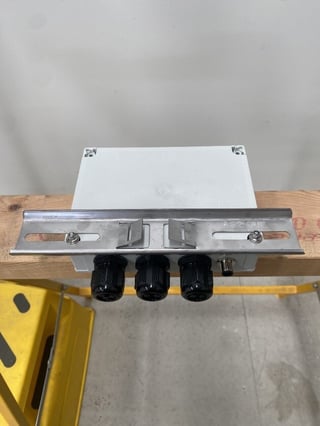
Step 4.1- Connect the provided bracket to the hub box
- Place x2 4mm bolts through the bottom 2 holes


- Attach bracket by placing the 2 bolts through the bracket slots
- Apply washers and 4mm locknuts, be sure to align the hub box in the middle of the bracket. Do not overtighten to avoid damaging the hub box.
Step 4.2 Connect hub box to pole
- Insert the hose clamp through the 2 slots in the rear of the bracket.
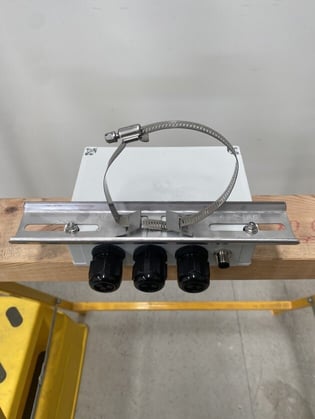
- Tighten the hose clamp around the pole
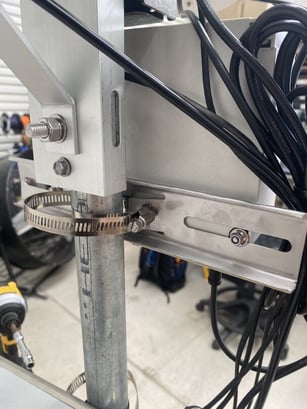
- Cutaway or tuck in the excess hose clamp to avoid any potential injury
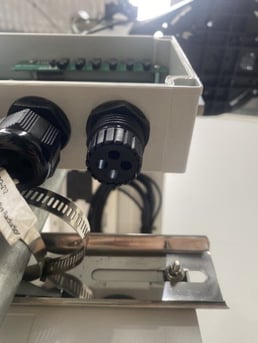
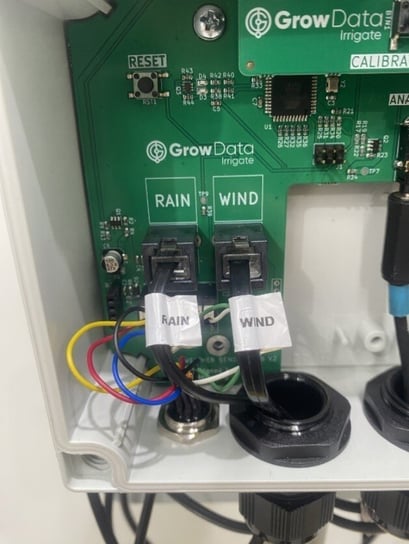
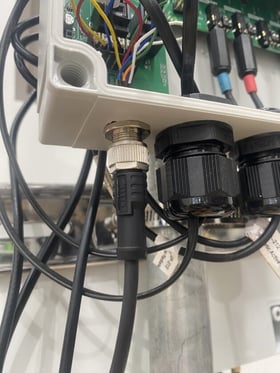
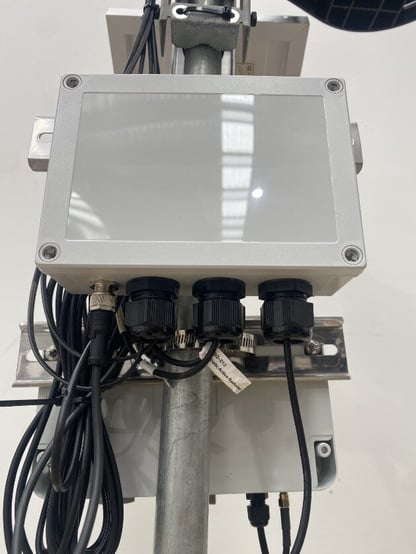
Step 4.3 - Connect sensors to hub box
- Remove gland caps and rubber inserts
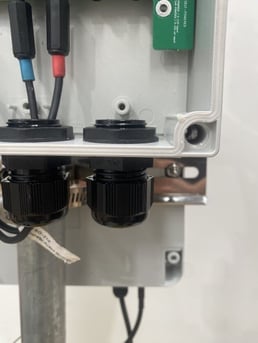
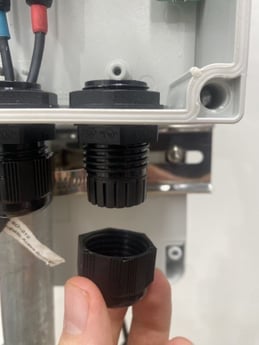
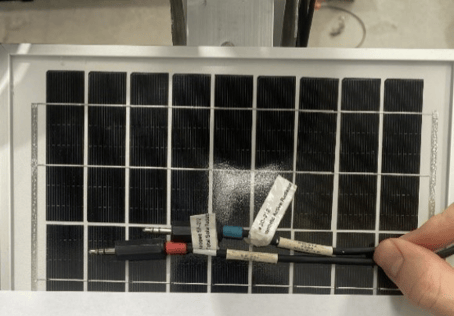
- Put sensor cable through gland cap first, then put sensor cable through rubber insert

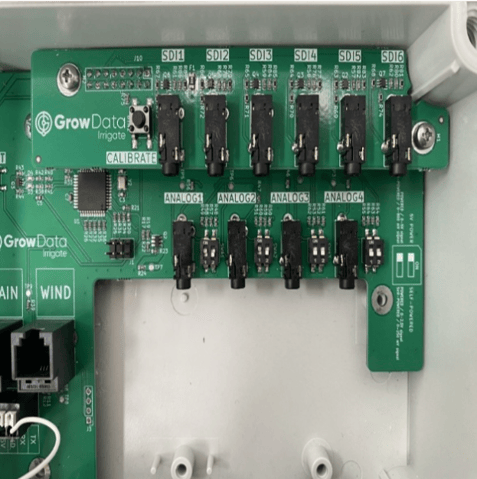
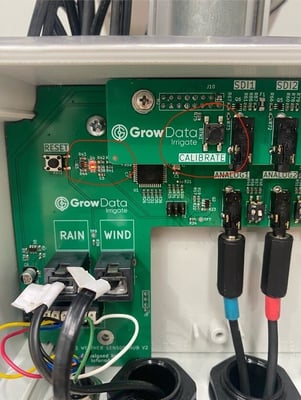
- Pull the sensor cable through the cable gland and plug it into the correct sensor port
(Please check the sensor reference table for correct sensor ports)

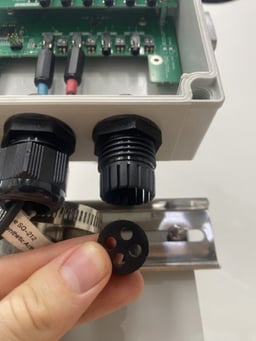
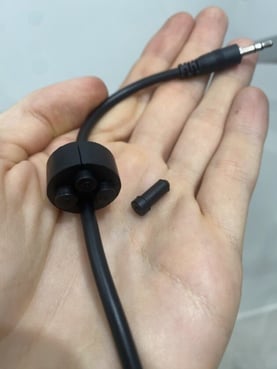
- Put rubber insert back into gland, please block any unused holes with the rubber plugs provided to prevent water from entering the box
- Tighten gland cap
Important note!
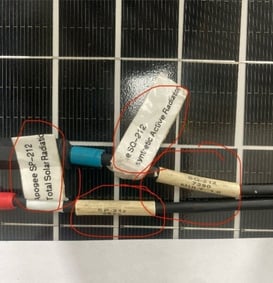
When installing sensors make sure to cross reference the sensor serial number with the sensor reference table.
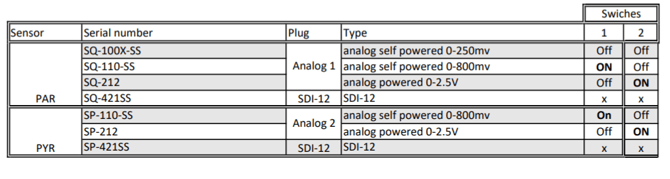
- PAR – check sensor serial number to sensor reference table for the correct port
- PYR – check sensor serial number to sensor reference table for the correct port
- Temperature/humidity – can be plugged into any SDI port (top row)
- Soil sensors - can be plugged into any SDI port (top row)
- Wind – wind sensor port (push down on plastic tab to remove sensor)
- Rain – rain sensor port (push down on plastic tab to remove sensor)
Step 4.4 - Connect hub box to SDI data logger
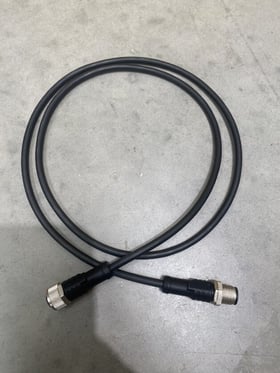
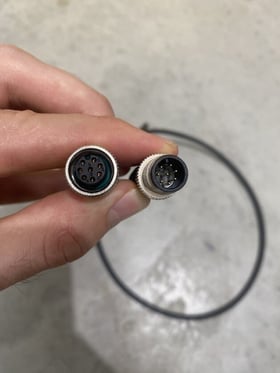
- Using the cable provided connect the hub box to the data logger, there is a slot in the cable which needs to be aligned with the plug. The cable will only go one way please do not try to force it.
Step 4.5 - Calibrate wind direction sensor
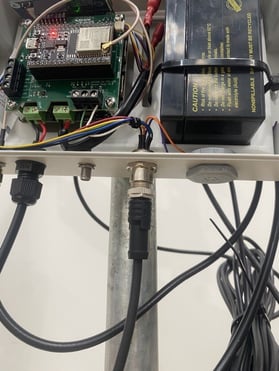
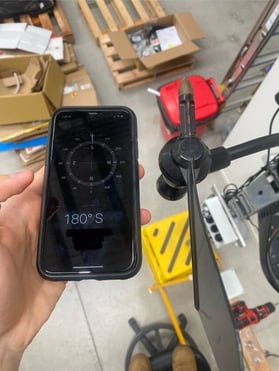
- Using a compass, point the wind direction sensor south. Tape it into position or have someone hold it in position while it calibrates.
- On the power circuit board, press the calibrate button. You will see some LED flashing lights indicating the sensor is being calibrated.
- Make sure the sensor stays pointing south whilst calibrating, this should take no more than 30 seconds. When the lights stop flashing the calibration is complete and the wind direction sensor is allowed to move freely.
Step 4.6 - Finalisation
Make sure cable gland caps are tight and cable gland rubber inserts have any available holes blocked with small rubber plugs.


- Install lid making sure it is seated correctly and tightly secured
- Tidy any excess sensor cables by wrapping them up and cable tying them
